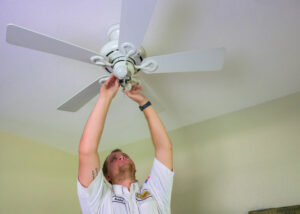
Ceiling Fan Installation: Can You Use Existing Wiring?
When you’re preparing to install a ceiling fan, the thought of rewiring your space might feel overwhelming—it may even keep you from starting the project altogether. But here’s the good news, in many cases, you can use your existing wiring, saving you time, money, and hassle.
That said, there are important things to consider before you break out your screwdriver. This guide will walk you through the key factors to keep in mind, why you might or might not need new wiring, and how to safely handle the installation. By the end, you’ll know exactly how to determine whether your current electrical setup is ceiling-fan friendly.
Why Use Existing Wiring?
If you’re replacing a light fixture with a ceiling fan, you’ve already crossed half the bridge toward installing your fan. The wiring for most ceiling-mounted light fixtures can be reused—saving you from drilling into drywall or running new cables through your ceiling.
Here are some reasons to use existing wiring:
- Simplicity: Reusing what’s already in place makes installation faster and easier.
- Cost Savings: New wiring can be expensive, especially if you need to hire an electrician.
- Fewer Structural Changes: Using existing wiring means there’s typically no need to open walls or ceilings, minimizing disruption in your home.
However, before you start installing, there are a few considerations to keep in mind.
Key Considerations Before You Begin
Check the Electrical Box
Not all electrical boxes can support a ceiling fan. A box meant for a light fixture might not be strong enough to handle the weight and motion of a fan.
Look for a label or marking inside the box. Many boxes are stamped with information about their load capacity. For a ceiling fan, the box must be rated to hold at least 50 pounds. If you don’t see any markings or the box feels loose, replacing it is necessary before moving forward.
Pro Tip: If you’re unsure about the durability of your electrical box, consider consulting a licensed electrician. It’s always better to double-check than to risk a wobbly fan or, worse, a falling one.
Assess the Wiring Type
While wiring from a typical light fixture might suffice, the existing setup must meet specific requirements for safety and functionality. The most important factors include:
- Grounded Wires: For safety, there must be a ground wire present.
- Switch Compatibility: If you plan to control the fan and light separately with two switches, you’ll need two hot wires running to the fan.
To check your wiring, carefully inspect what’s behind your existing fixture. If you’re not confident in identifying the wires, call in a professional for an inspection.
Evaluate the Circuit Load
Ceiling fans typically don’t use an enormous amount of power, but they do add to the total load on the circuit. If the circuit already powers a lot of other devices or appliances, you’ll want to confirm that it can handle the fan without tripping a breaker.
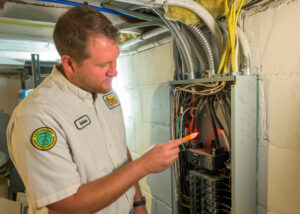
Your home’s electrical panel should have information about breakers and circuit loads. For safety, confirm that there’s enough capacity to accommodate the new addition.
When New Wiring Is Necessary
Sometimes your existing setup won’t work, and you’ll need to upgrade the wiring. Below are a few circumstances when this becomes necessary:
- No Ground Wire Available : Modern safety standards require grounded wires to reduce the risk of electric shock or fire. If your wiring lacks a ground, you’ll need to replace it.
- Adding Dual Switch Capabilities: If you want to operate the fan and light independently with two switches, you’ll likely need additional wires for separate controls.
- Damaged Wiring: Frayed, brittle, or damaged wiring can’t reliably or safely carry electricity. Always inspect the condition of your existing wires before starting the installation.
Step-by-Step Guide to Decide
If you’re still on the fence about whether your wiring is suitable, follow these steps to figure it out:
Step 1. Turn Off the Power & Inspect the Existing Fixture
Begin by turning off the circuit breaker connected to the existing fixture. Once the power is off, remove the fixture and examine the wiring. You’re looking for:
- A ground wire (either bare copper or green insulation)
- At least one hot wire (typically black or red insulation)
- A neutral wire (white insulation)
Step 2. Confirm the Electrical Box Rating
With the fixture removed, check the box itself. If it’s not specifically marked as “fan-rated,” plan to replace it with one that meets the requirements.
Step 3. Test the Circuit Capacity
Use a multimeter or voltage tester to confirm the circuit has enough capacity. If you’re unsure how to perform the test, consulting an electrician is a safer route.
Step 4. Decide If You Need a Pro
If all components—wiring, capacity, and the electrical box—check out, you’re likely good to go! If any component seems questionable, hiring an electrician ensures the job is done correctly.
What Tools and Materials Will You Need?
Before you start, gather the following tools to save yourself headaches mid-project:
- A screwdriver (Phillips and flathead)
- Voltage tester
- Needle-nose pliers
- Wire stripper/cutter
- Ceiling fan mounting bracket (if not included with your fan)
- Electrical tape
Having everything prepared will make the process smoother and safer.
Tips for a Smooth Installation
- Consider the Ceiling Height: Ensure the fan blades will be at least 7 feet above the floor. Standard or extended downrods may be required for higher ceilings.
- Secure the Mounting Bracket Firmly: The mounting hardware should be attached tightly to prevent any wobbling during operation.
- Follow Manufacturer Instructions: Always follow the manual that comes with your ceiling fan for wiring specifics.
- Label the Breaker: If you’ve had issues locating the circuit breaker, label it for future reference to save yourself time and frustration.
Bringing in Professional Help
If you encounter issues such as outdated wiring, an overloaded circuit, or a lack of grounding, bringing in a professional electrician can save you costly mistakes. While ceiling fan installations are often manageable as a DIY project, ensuring your work adheres to safety regulations is critical for peace of mind (and avoiding future headaches).
Make Installation Safe and Simple
Installing a ceiling fan is an excellent DIY project that can enhance your home’s comfort while saving you energy costs. Reusing existing wiring is not only practical but also reduces unnecessary changes to your home. However, safety should always take precedence, so if you find yourself unsure at any step, reach out to a professional.
